Announcing Portals for React Native


Today we are thrilled to announce React Native support for Portals, our new SDK for building mobile apps that utilize a micro-frontend architecture to scale app development across teams in large organizations.
Portals makes it possible to embed micro-frontend web experiences into a single React Native app through a drop-in React Native component. A Portals component hosts a Web View but extends it with powerful functionality such as the ability to expose native functionality to each Web View in a controlled, safe manner, and best-practices around implementing the Web View lifecycle. Most importantly, each Portal can be updated remotely in real-time, so teams can ship bug fixes and new features in parallel and as soon as they’re ready.
With this, Portals for React Native allows React Native teams to:
- Share React web code with their React Native mobile app and enable React web teams to contribute to the app
- Embed existing web experiences in a seamless, high-quality way that feels just as native as the rest of the app
- Ship faster by enabling teams to publish updates in parallel and in real-time, without the bottleneck of traditional mobile releases
Portals also supports traditional iOS and Android apps and hybrid apps, and can be used across a variety of mobile frameworks and technologies a team may be using. Portals is in production in a number of significant mobile apps built by large teams, helping them scale and ship faster.
Using Portals in React Native
Adding a Portal to a React Native view is just like any other React Native component. First, configure a portal (this is typically done in index.js):
import { addPortal } from '@ionic/portals-react-native';
const helloPortal = {
  // A unique name to reference later
  name: 'hello',
  // This is the location of your web bundle relative to the asset directory in Android and Bundle.main in iOS
  // This will default to the name of the portal
  startDir: 'portals/hello',
  // Any initial state to be provided to a Portal if needed
  initialContext: {
    greeting: 'Hello, world!'
  }
};

addPortal(helloPortal);
Then, in the file for the screen the Portal will display in, add the component:
import { PortalView } from '@ionic/portals-react-native';

<PortalView
  // The name of the portal to be used in the view
  name='hello'

  // Set any initial context you may want to override.
  initialContext={{ greeting: 'Goodbye!' }}

  // Setting a size is required
  style={{ flex: 1, height: 300 }}
  />
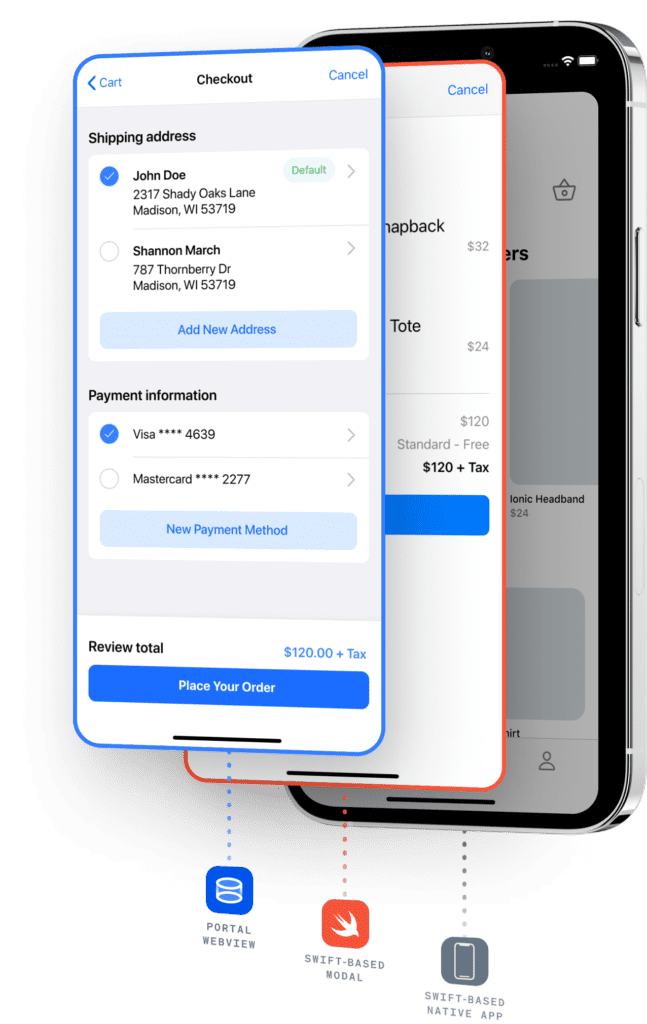
A Portal component can be placed anywhere you like, such as in a Modal, as a screen in a navigation flow, or a sub-region on an existing screen. A typical Portals-based app architecture might look like this (substitute React Native for Swift):
Getting started
To help React Native teams start using Portals, we’ve provided a number of resources. First, explore the Getting Started with Portals for React Native documentation. Then, check out our React Native E-commerce App Demo for a real app using Portals.
To learn more about Portals and why we built it, explore the Portals site or the documentation.


